Install from source (developer version)
If you want to try out experimental features (and, if you have time, maybe report a bug or two :D), you can install the developer version from source as follows:
- Install Anaconda or Miniconda
Anaconda is the standard package manager for Python in the scientific community. It comes with a GUI for user-friendly package installation and management. However, here we describe its use through the terminal. Miniconda is a lightweight implementation of Anaconda without the GUI.
- Open a terminal
Roughly speaking, a terminal is a text-based way to run instructions. On Windows, use the Anaconda prompt, you can find it by searching for it. On macOS or Linux you can use the default Terminal.
Update conda by running the following command:
conda update conda
This will update all packages that are part of conda.
Create a virtual environment with the following command:
conda create -n acdc python=3.10
This will create a virtual environment, which is an isolated folder where the required libraries will be installed. The virtual environment is called
acdcin this case.Activate the virtual environment with the following command:
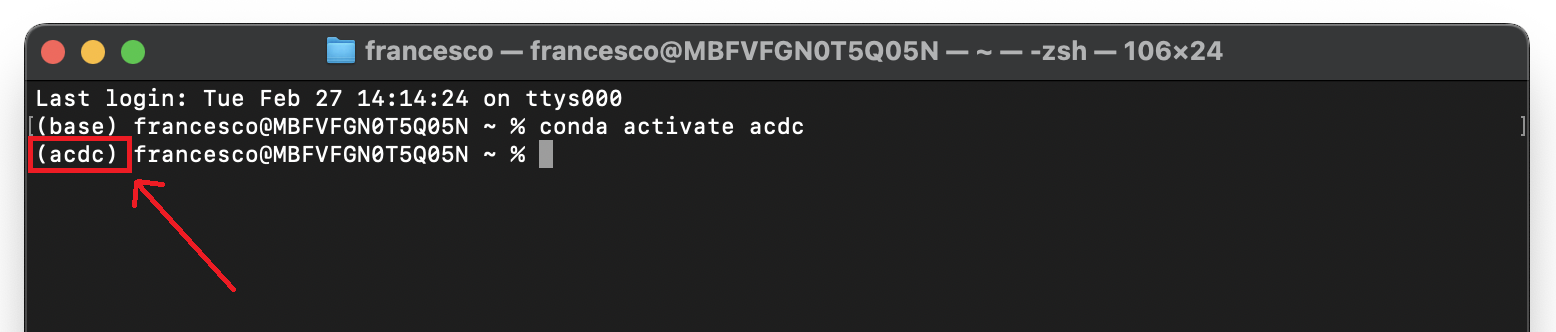
conda activate acdc
This will activate the environment and the terminal will know where to install packages. If the activation of the environment was successful, this should be indicated to the left of the active path (you should see
(acdc)before the path).Important
Before moving to the next steps make sure that you always activate the
acdcenvironment. If you close the terminal and reopen it, always run the commandconda activate acdcbefore installing any package. To know whether the right environment is active, the line on the terminal where you type commands should start with the text(acdc), like in this screenshot:Update pip with the following command:
python -m pip install --upgrade pip
While we could use conda to install packages, SpotMAX is not available on conda yet, hence we will use
pip. Pip the default package manager for Python. Here we are updating pip itself.

Clone the source code with the following command:
git clone https://github.com/ElpadoCan/SpotMAX.git
Important
On Windows, if you get the error
ERROR: Cannot find the command 'git'you need to installgitfirst. Close the terminal and install it from here. After installation, you can restart from here, but remember to activate theacdcenvironment first with the commandconda activate acdc.Navigate to the SpotMAX folder with the following command:
cd SpotMAX
The command
cdstands for “change directory” and it allows you to move between directories in the terminal.Install SpotMAX with the following command:
pip install -e "."
The
.at the end of the command means that you want to install from the current folder in the terminal. This must be theSpotMAXfolder that you cloned before.Install the GUI libraries:
If you plan to use the SpotMAX GUI and you never used Cell-ACDC before, run the command
acdc. Remember to always activate theacdcenvironment with the commandconda activate acdcevery time you open a new terminal before starting Cell-ACDC.The first time you run Cell-ACDC you will be guided through the automatic installation of the GUI libraries. Simply answer
yin the terminal when asked.At the end you might have to re-start Cell-ACDC.
See also
If you prefer to install the GUI libraries manually, these are the pacakges required:
conda install -c conda-forge pyqt
conda install -c conda-forge qtpy
conda install -c conda-forge pyqtgraph
conda install -c conda-forge seaborn
conda install -c conda-forge pytables
pip install PyQt6==6.6.0 PyQt6-Qt6==6.6.0
pip install qtpy
pip install pyqtgraph
pip install seaborn
pip install tables
Optional: install Numba
SpotMAX can take advantage of multiple CPU cores using the package numba.
For more details, see the Numba documentation.
This typically increases execution speed. After installing SpotMAX, consider
installing numba with the following command:
conda install numba
pip install numba
Note
You can set the number of CPU cores used by numba in the INI
configuration file using the Number of threads used by numba
parameter as follows:
Updating SpotMAX installed from source
To update SpotMAX installed from source, open a terminal window, navigate to the
SpotMAX folder with the command cd SpotMAX and run git pull.
Since you installed with the -e flag, pulling with git is enough.